


#AWSAmplifyHackathon #AWSAmplify
Introduction
Welcome to my blog where I'll take you on an exciting journey through the creation of my AWS Amplify Hackathon project. In this project, I had the opportunity to explore the power of AWS Amplify Studio, a cutting-edge visual development environment that revolutionizes the way we build full-stack web and mobile applications. With its user-friendly interface and seamless integration with other AWS services, Amplify Studio empowers developers to accelerate UI development while maintaining complete control over their app's design and behavior through code.
💡To know more visit AWS Amplify
💡If you haven't started your Hashnode Blog, then what are you doing, visit Hashnode.com and start your Tech blog today!
MediFind
Inspiration
As an undergraduate college student with a passion for cloud computing and a love for exploring different cities across Canada🍁, participating in the Amplify Hackathon was a dream come true. As this was my very first hackathon, I was a little nervous and worried about not knowing much about the tech stack that would be used for this project. I had played around with AWS services such as AWS SAM, Lambda, EC2, S3, DynamoDB, & CloudFormation, but I've never used React or Amplify. The idea for my project was born from personal experiences and the desire to make a positive impact on the lives of others💡🤝
Arriving in a new city can be both exciting and challenging, and one of the essential tasks is finding reliable healthcare providers for regular health check-ups. I often found myself wishing for a convenient web app that could effortlessly display all the nearby healthcare options, complete with ratings and reviews from fellow users 🙌. Just like how Airbnb or Booking.com simplify the process of finding the best accommodation 🛏️.
However, I understand that not all data available online is reliable, and the last thing anyone needs is misinformation when it comes to their health 😕. That's why my vision for this project includes a feature that allows users to access the official website of each healthcare provider, enabling them to verify credentials and services with confidence.
Wouldn't it be truly awesome to have such an app that caters to the needs of travelers and locals alike? 😍 With this project, I am determined to create a user-friendly and reliable platform that provides essential healthcare information to anyone in need, making their journeys more comfortable and their health a top priority 🚀
🧑⚕️ About MediFind
MediFind is a web application that allows authenticated users to have access to and contribute to a comprehensive list of healthcare providers in their city.
As an authenticated user, you can currently enjoy the following features:
🔍 Search for Healthcare Providers Easily find healthcare providers near you with our intuitive search functionality. Whether you're a traveler exploring new cities or a local in need of reliable medical services, MediFind has you covered.
➕ Create Healthcare Provider Data Contribute to our growing database of healthcare providers by adding essential information about healthcare facilities, doctors, and clinics in your area. Share your discoveries with the community to help others in their search for quality medical care.
📸 Upload Images of Healthcare Providers Capture the essence of healthcare facilities by uploading images of the providers you visit. Let fellow users get a glimpse of the place they might choose for their health needs.
As we continue to improve and expand our platform, we have exciting plans for the future:
⭐ Rate and Review Healthcare Providers In upcoming versions, you'll be able to rate and review the healthcare providers you visit. Share your experiences and valuable insights to guide others in their healthcare decisions.
🔒 Verified Provider Information We understand the importance of reliable information in the healthcare industry. In the future, we aim to collaborate with official sources to provide verified data, ensuring you have access to the most accurate and up-to-date details.
🤝 Community-Driven Accuracy MediFind values the contributions of its users. If you notice any outdated or incorrect information in our database, you can help us maintain data accuracy by updating the relevant fields.
Project Tech Stack
🎨Amplify Studio - Using Figma to design front-end components, I crafted stunning UI designs and then imported them seamlessly into Amplify Studio
- Amplify Studio's Form Builder is a visual interface for creating React forms. You can configure validation logic, adjust theming, and customize presentation all within the console.
🗄️Amplify DataStore (AWS DynamoDB) - secure and scalable data storage for healthcare provider information.
🚦React router dom library: Used in handling frontend page routing
🖼️AWS S3 : Used to securely store and present healthcare provider images uploaded by users.
🔑AWS Cognito (User Authentication) - user sign-up & access
🚀AWS AppSync - to develop & test Graphql APIs by handling the heavy lifting of securely connecting to data sources like AWS DynamoDB, AWS Lambda, and more.
React & GraphQl: to build the UI components of the App and responsible for our data model
Amplify Hosting: For making the app publicly accessible
About AWS Amplify 🚀
AWS Amplify is a complete solution that lets frontend web and mobile developers easily build, ship, and host full-stack applications on AWS, with the flexibility to leverage the breadth of AWS services as use cases evolve. No cloud expertise is needed.
AWS Amplify Studio 🎨
Amplify Studio is a visual playground, powered by the Amplify UI library. It comes loaded with dozens of ready-to-use components, from news feeds to contact forms, and essential building blocks like buttons and text areas.
I created some front-end components in Figma, imported them using Amplify Studio ready to be used in my app
Amplify Studio's Form Builder is a visual interface for creating React forms. You can configure validation logic, adjust theming, and customize presentation all within the
AWS Amplify CLI⚙️
The Amplify Command Line Interface (CLI) is a unified toolchain to create, integrate, and manage the AWS cloud services for your app. Here are the top features:
Data modeling with GraphQL: Easily model and access data in your app allows you to focus on delivering core features and business value instead of architecting and re-architecting your back end.
Multiple environments: You can create and switch between different backend environments (e.g. dev, qa, and prod) for your project
Features
📍Login credentials & Github Link:
MediFind app login credentials: username: coolchigi password: amplifyFR02! https://github.com/coolchigi/MediFind
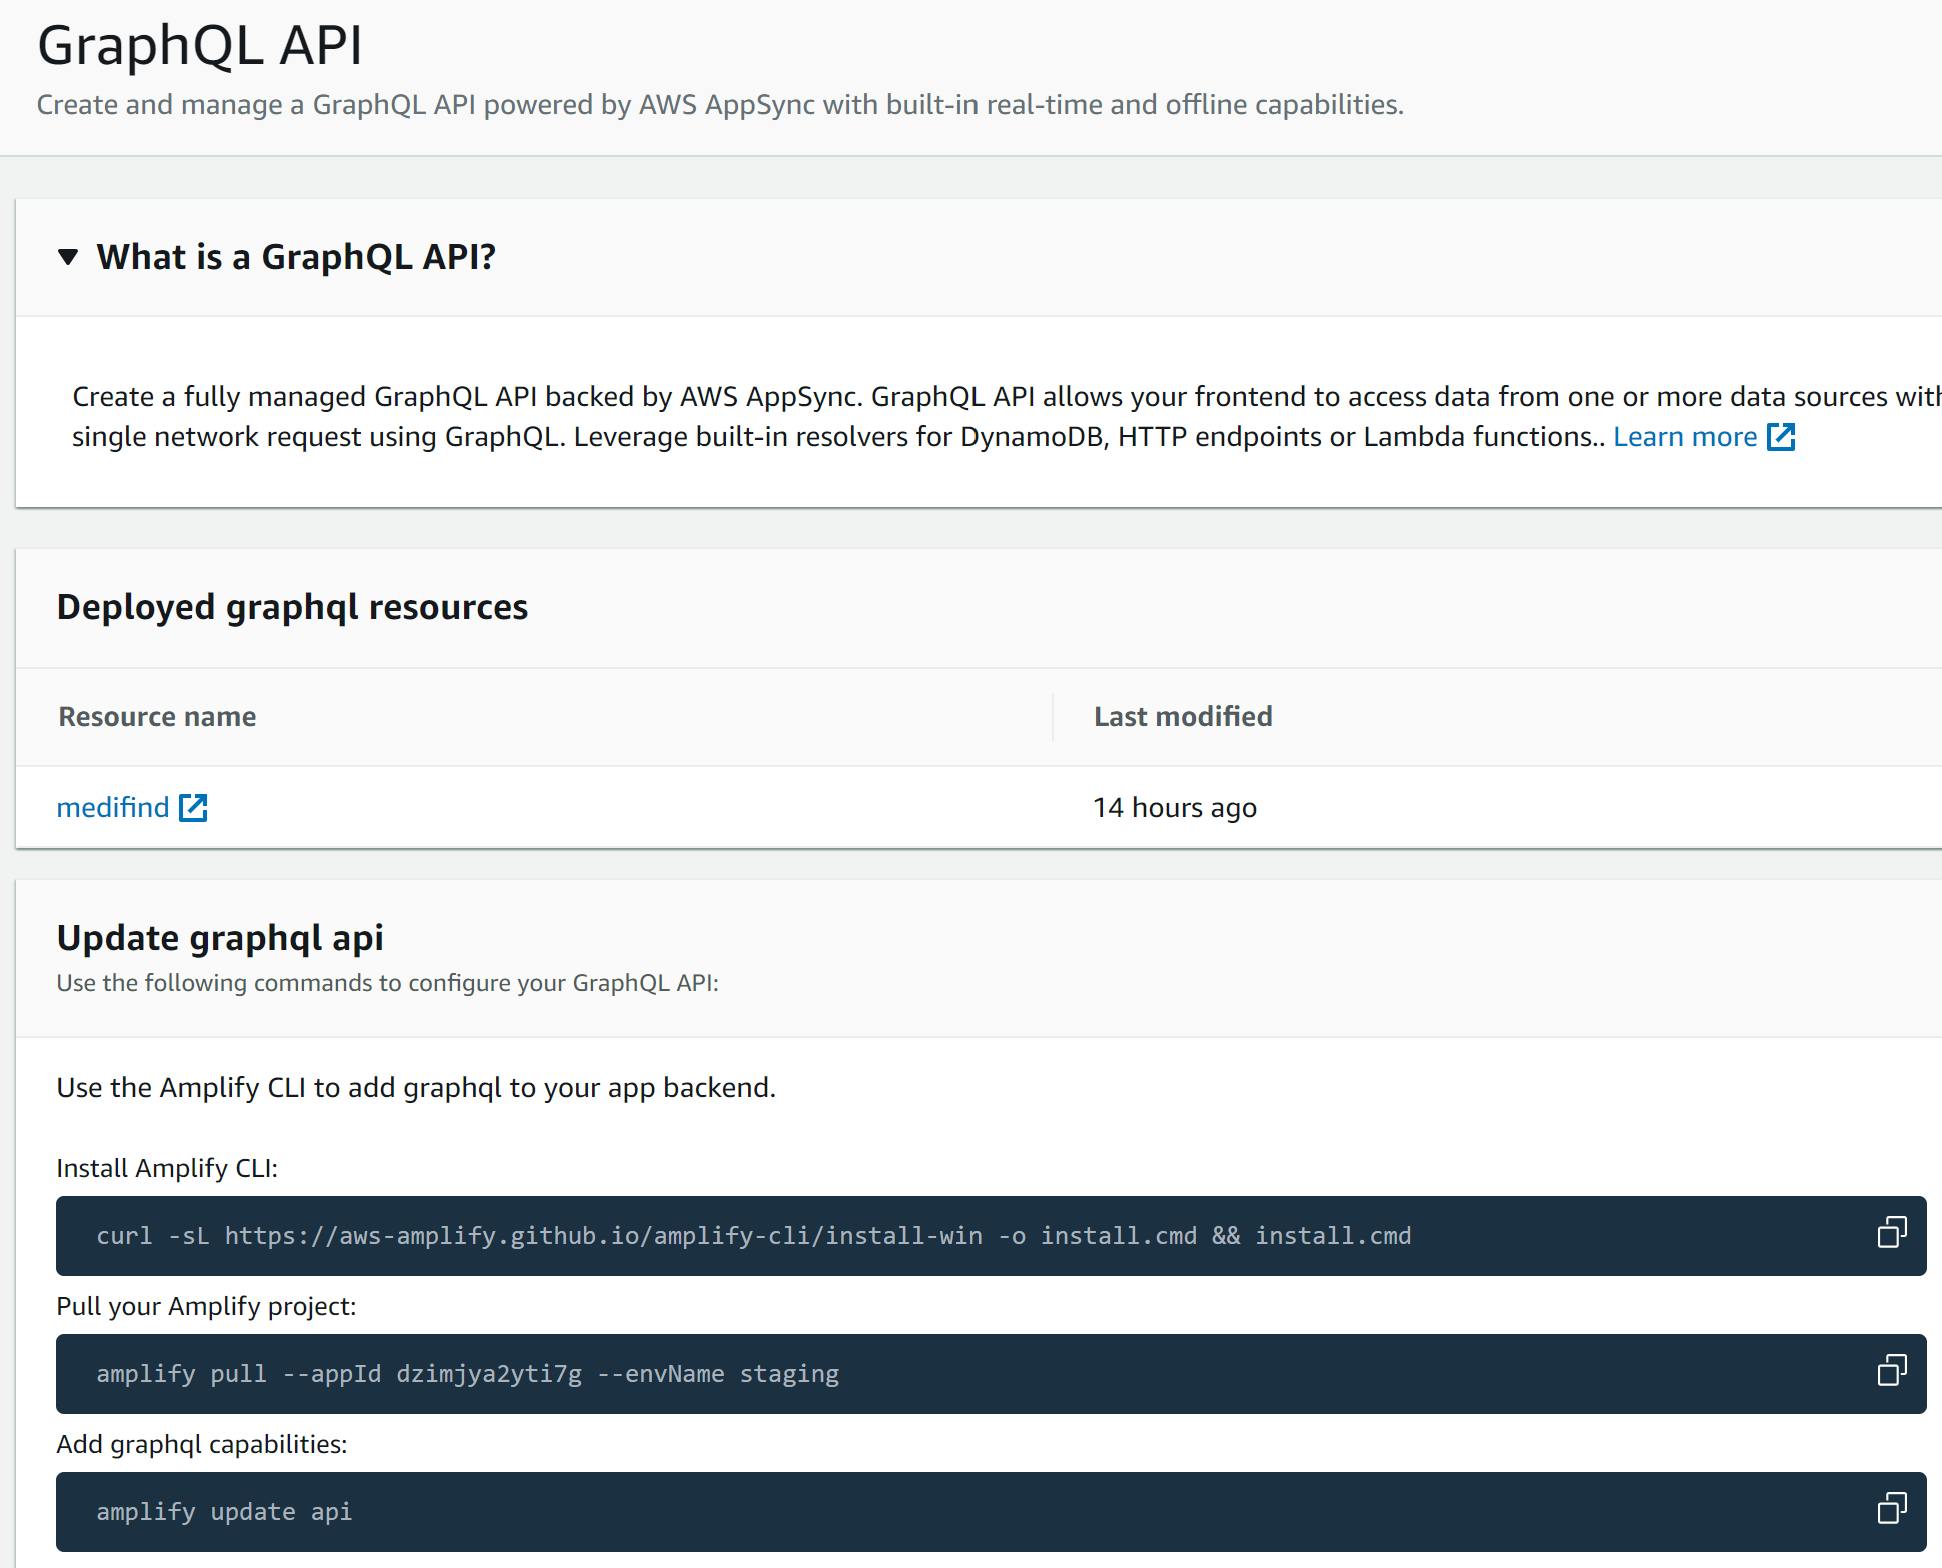
GraphQL API
GraphQL API powered by AWS AppSync. AppSync is a fully managed service that simplifies building scalable and real-time applications. It enables the creation of GraphQL APIs quickly without manually configuring servers and databases or handling network infrastructure.
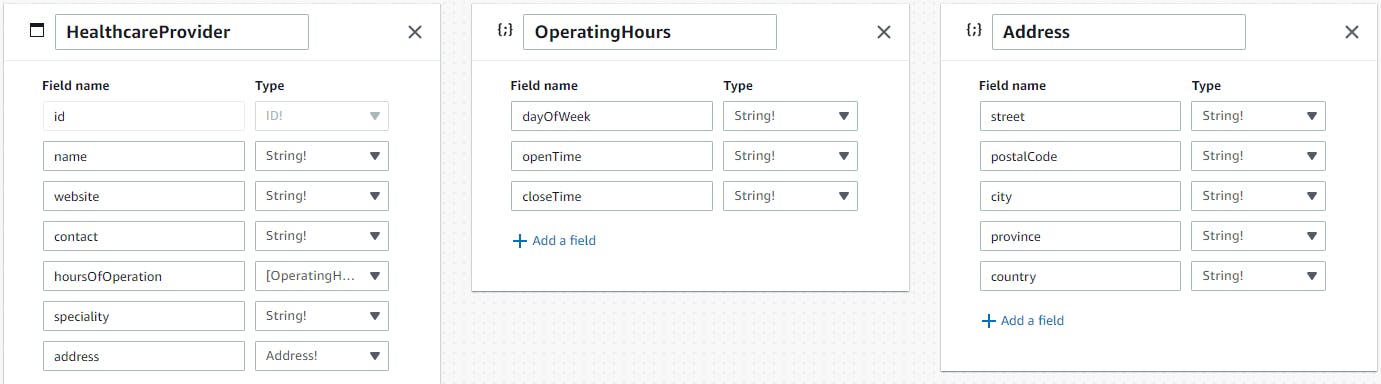
Data Models
Amplify Studio lets you define data models for your application. The Studio data model designer provides a visual way to define your app's data model, relationships, and authorization rules.
All data models are provisioned in your account as AWS AppSync GraphQL APIs and Amazon DynamoDB tables. As with every feature of Studio, it can be further extended with the CLI.
I created my data models using Amplify Studio.
Launch Amplify Studio for an App: Start by launching Amplify Studio for your app.
Navigate to the Data Section: On the setup menu, choose 'Data’.
Create a New Data Model: On the Data modeling page, choose ‘Add model’ to create your first data model. You can think of a model as a table in your database.
Define Your Model: Enter the model title and add the necessary fields. For example, if you’re creating a ‘Posts’ model for a blog, you might add fields like ‘title’, ‘content’, and 'summary’.
Save and Deploy Your Model: After defining your model, click on ‘Save and Deploy’ to deploy the infrastructure. This will deploy your data model to the cloud.
Browse and Auto-generate Your App Data: After your backend is deployed, choose ‘Content’ on the Manage menu to start browsing your app data1. Amplify Studio also provides a feature to auto-generate seed data to help you test your app faster.
Frontend Components
Amplify frontend components have two parts, Figma to Code & Form Builder. Both allow you to use React to generate components for your application
Form Builder
Amplify Studio's Form Builder is a visual interface for creating React forms. You can configure validation logic, adjust theming, and customize presentation all within the console.
I used the form builder to create a page that would let users edit healthcare provider data

Figma To Code
Amplify Studio offers integration with Figma, allowing you to generate clean React code by importing your Figma design file.
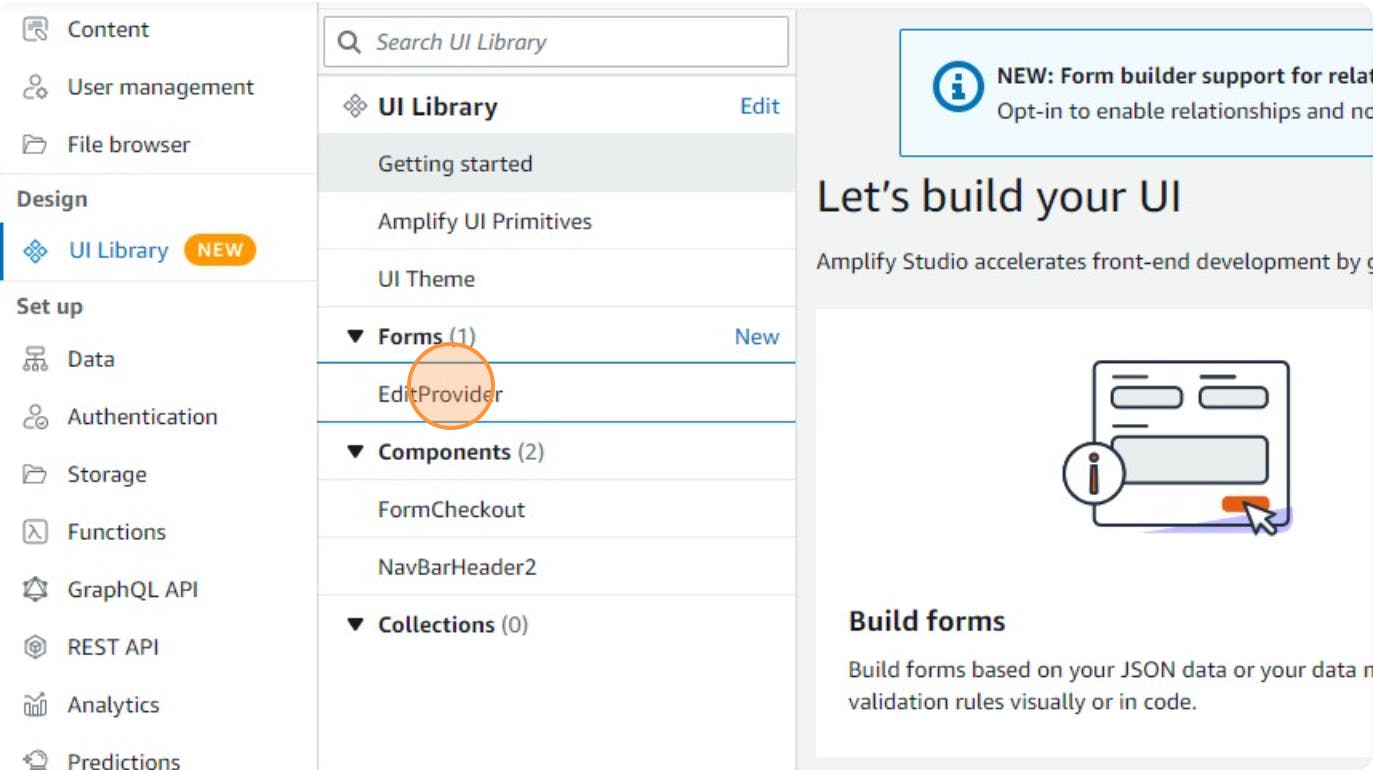
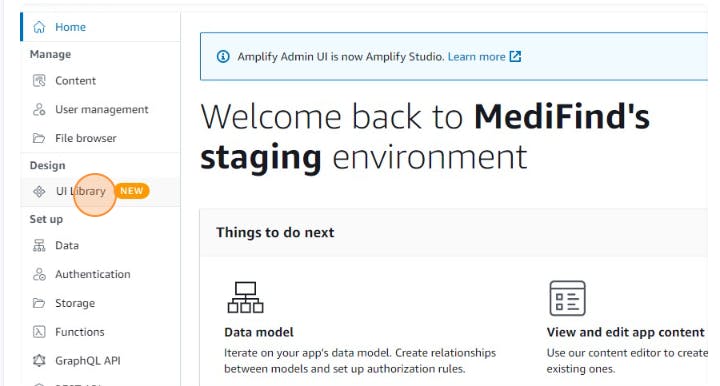
To import your Figma file, go to the UI Library section of the Amplify Studio
Click on UI Library and click “Sync with Figma”
You will be prompted to either log in with your Figma account or create one if you don't have one already

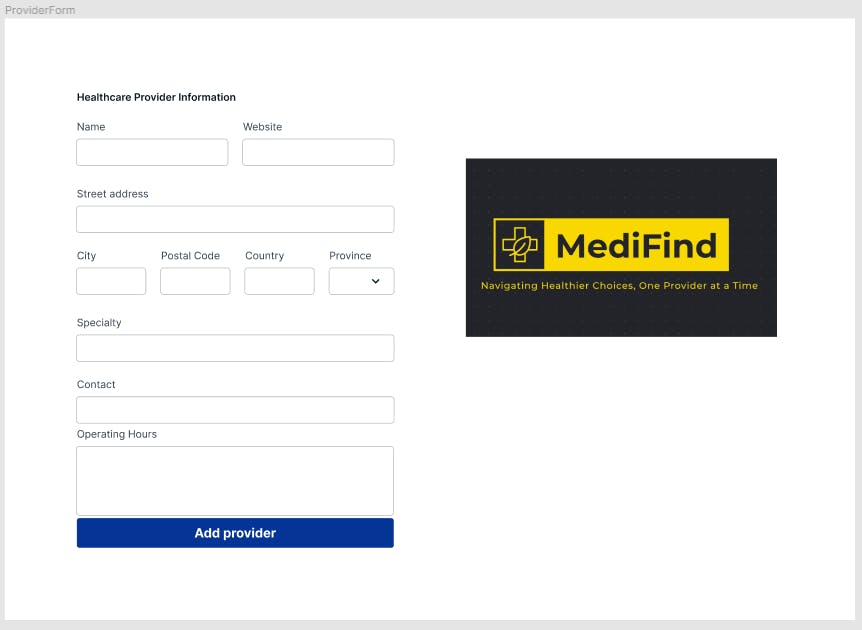
The form was styled in Figma and imported
Connect Data Models To UI Components
Amplify lets you connect your data to your Figma-created components
From the Amplify Console, click on the "Launch Studio" button
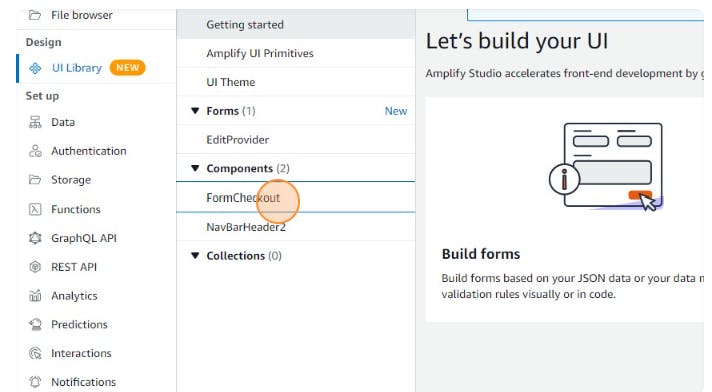
Click on UI Library
Select the component you would like to bind to your model - it was FormCheckout
Click on the Configure button to the right

Clicking on your button or in my case "Add provider" opens up a data binding panel that allows you to specify how the data from the UI component will be bound to the data model
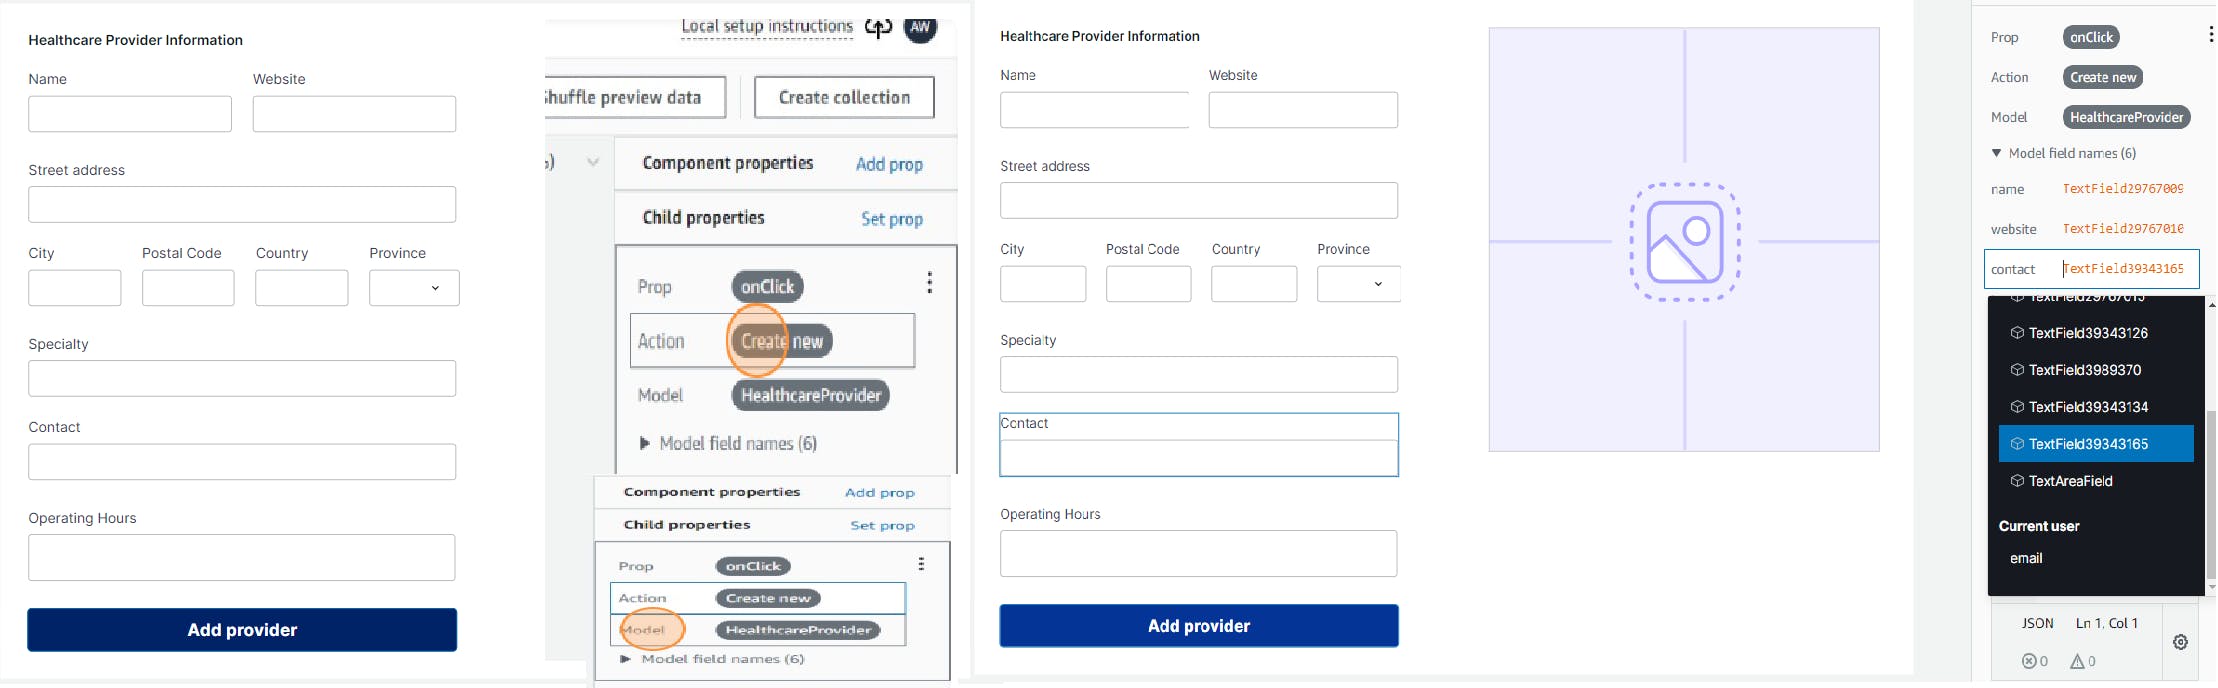
Choose Data Field: In the Data Binding panel, select the field in your data model that should receive the data from the UI component. For example, if the UI component is the "Name" of the healthcare provider, choose the corresponding field in your data model
Repeat for the other components. Once you are satisfied, click "Local setup instructions" and copy the command

Feedback and Conclusion
Participating in my first-ever hackathon has been an exhilarating and rewarding journey. As someone with a strong background in cloud and backend development, I was eager to explore new challenges and showcase my skills. While my expertise lies mainly in the technical aspects, I quickly realized that user interface design is an area I need to improve upon. But hey, we all start somewhere, right?😄
Throughout the hackathon, I embraced the opportunity to work at my own pace and dive deep into the intricacies of the project. The experience of tackling every aspect of the development process has been a great learning curve. I gained valuable insights into problem-solving, time management, and staying motivated through the ups and downs of the development process.
I'm genuinely thrilled with the progress I've made so far. The project has taken shape, and I'm proud of the functionalities I've implemented. However, I also acknowledge that there's always room for improvement and growth. As I continue to refine and enhance the project, I'll focus on improving the UI and making the application more user-friendly.
Participating in the hackathon has ignited a spark in me to keep pushing the boundaries of my technical expertise. I'm eager to explore new functionalities, add exciting features, and even consider incorporating user feedback to make the project truly stand out. 💡📈
To fellow developers and aspiring hackers, remember that every challenge is an opportunity to grow. Embrace the journey, stay curious, and never stop coding! 🚀
Some Useful Links
Figma
Material-UI